Sunday 5 May 2013

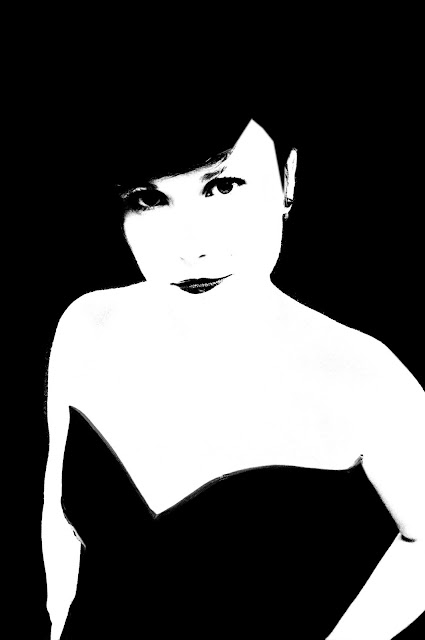
Extreme Contrast Portrait Tutorial

A different way for a super extreme contrast portrait.
Here's how i did it:

1. Chose your photo.

2. Select the Polygonal Lasso Tool

3. Draw a path around the skin areas

4. Head to the top of the page & click on the Select Header & then on "Color Range". 

5. Click in the skin area on photo (left hand side photo here).

6. Change picker tool to the one with the + sign & continue to click on the skin until you reach this effect. press OK

7. Click on the Select header again & click on Save Selection

 8. Call this layer "Skin". Press OK.

9. Deselect skin
(Command D)

10.Click on the Channels section.

11. Delete channels RGB, Red, Green, Blue.

*Note: To save out as a Jpeg you will need to copy & paste the image onto a new page & flatten. Save As Jpeg.

**Other options for funky portraits.**
If you want to try some other options for extreme portraits you can try deleting channels & leaving the combinations below:

Blue/Green

Red/Blue

Red/Green

Or just leave one:

Red

Green

Blue


Monday 22 April 2013

How to Andy Warhol yourself.

Ok so today the word/s of the day was Andy Warhol. I decided to do my own version of the Marilyn Monroe Silk Screen.
Here is how i did it.

1. Start with a photo that is inspired by the 70's, i used this one.
  
2. Change mode to Greyscale

3. Then change Mode back to RGB. Don't flatten.
 
4. Using the Pen tool create a Path for the hair. Label Hair Path.

Click back to the Layers tab & create a new Layer - call Hair.

Make Hair Path a selection & click on the background layer.

 Play with the light & dark points in the Levels function to create shadows in the hair.

5. Select Hair Layer. 
Choose colour that you want for the hair. I used colour #fef14a.
Fill colour in Hair Selection & make 80% opacity. Deselect Hair.

6. Click back to background layer & using the Magic Wand select the dark shadows in the hair using a tolerance of 50.
  
7. Click back to Hair Layer
Fill with Black at 100% opacity.
  
9. Repeat steps  4 to 8 for:
Face
Lips
Eyeshadow
Jacket.

10. Once all have been done, flatten.
11. Select background with the Magic Wand tool & fill with your selected colour at 100% opacity & Voila! If you want to do the same photo with different colours all you need to do is select the part you want to change & just change the colour.

Here is my finished photo.


Pink Inspired Photoshoot


Wednesday 3 April 2013

Pop Candy

I had so much fun doing this! After the Pop Art challenge yesterday i wanted to create my own Pop Art piece.
Here is how i did it:

1. I chose 2 photo's that i wanted & merged as one.
 2.Followed the steps on this tutorial, there are some minor details that i did change with the Halftone Effect to get the effect that i wanted but everything i followed text book. This tutorial is awesome & so easy to follow. If anyone has a go, i'd love to see them :)
http://10steps.sg/tutorials/photoshop/create-a-retro-pop-art-in-photoshop/

I made the Lollipop by playing around with the Distort Filter --> Twirl & repeated until i had the desired swirl i wanted. I then used the circle marquee & selected an area & then copied & pasted onto a new page & made the lollipop stem. I then transferred to the final image & repeated step 4 on the link to create the Halftone effect.

Here is my final image. The theme today was "Candy" & as i was inspired by Pop Art this is what came about. The words in the speech bubble are from an Iggy Pop song called Candy. If you're a 90's child like me, you would already know that ;)


Tuesday 2 April 2013

Whaam!

Today's word for the 365 Project April list was "Pop Art". I found this diamond of mural on Alice Street, Newtown. It's my favorite artist of all time Roy Litchenstein's piece "Whaam! circa 1963.
I also did some research on how to create a Pop Art effect using Photoshop.
Here is how i edited these photo's:


1. Colour correct
2. Apply Boost Action, flatten image
3. Apply Filter: Smart Sharpen

To apply Pop Art Effect:
4. Go to Filter --> Pixelate --> Colour Halftone
change boxes to the following:
& Voila!

I think i'll be trying this out on a few other things ;)

Graffiti Overload

Today's challenge word is Graffiti.
Not hard to find here in Sydney.


Another Beautiful Morning's Walk

    Had to share this beautiful morning